How to Fix Loose Roof Shingles
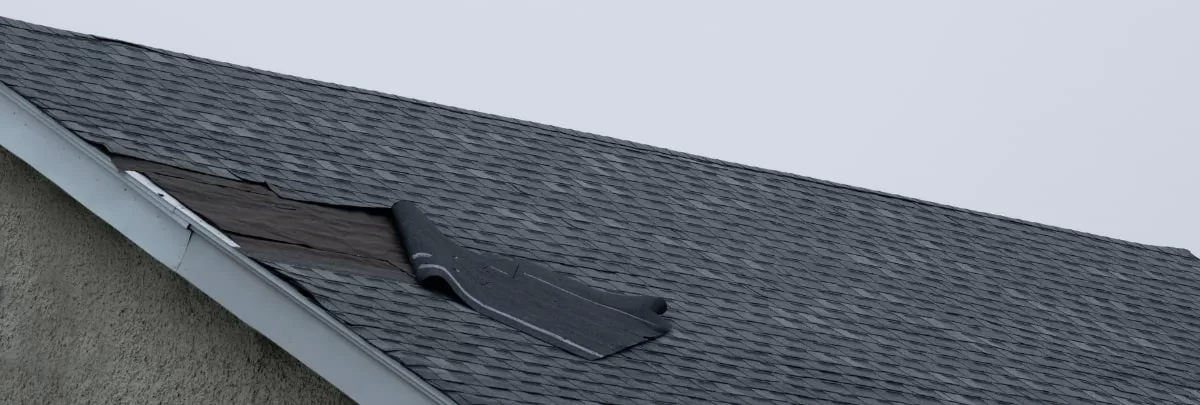
Loose roof shingles can be more than just an eyesore; they can be the prelude to significant home damage and even a total roof replacement if not addressed promptly.
Securing those wandering shingles enhances your home’s appearance and prolongs your roof’s lifespan.
In this comprehensive guide, we’ll walk you through the steps to tackle those pesky shingle issues with the precision of a seasoned pro.
First Things First: Evaluate Shingle Damage
First, determine if you can handle this task or if it’s time to contact experts.
Extensive damage, lack of proper tools, or an aversion to heights might mean it’s time to call professional roofers. Remember, they’re trained to handle such tasks safely and efficiently.
Tackling roof repairs alone can be risky. Relying on professionals ensures proper repairs, potentially saving you future headaches and roof replacement costs.
However, if you’re skilled and the damage is minimal, perhaps involving a shingle, please proceed to the next step.
Identifying Loose Shingles
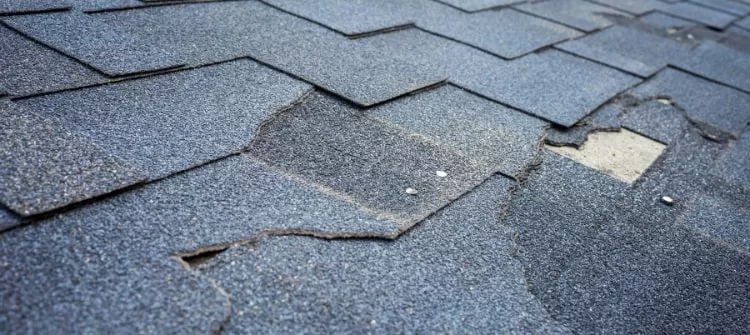
Before diving into repairs, it’s crucial to identify which shingles are causing the problem.
Visual Inspection
- Check for Curling: Shingles tend to curl at their edges over time. Look for any signs of upward bending.
- Scan for Buckling: This typically appears as a raised strip or bubble in the center of the shingle.
Physical Examination
- Gently Tug: Grasp the suspected shingle’s edge and give it a light tug. If it moves with little resistance, it’s loose.
- Press Down: Applying slight pressure will help determine the degree of looseness.
Essential Tools and Materials
Gathering the right tools is half the battle. Ensure you have the following at your disposal:
- Roofing cement or adhesive
- Roofing nails
- Putty knife or trowel
- Hammer
- Pry bar
- Safety gear (gloves, non-slip shoes, safety harness)
- Replacement Shingles: Were any spare shingles left by the builder or prior homeowner? If they didn’t, visit your local home improvement store to locate shingles that align in both color and size. While you’re there, pick up any additional materials you might not have on hand at home.
Step-by-Step Guide to Securing Loose Shingles
Navigating the world of roof repairs can be daunting, especially when shingles decide to go rogue.
Follow our comprehensive step-by-step guide to help you secure those loose shingles confidently and precisely.
Preparing the Area
- Safety First: Always use a sturdy ladder and wear safety gear.
- Clean the Area: Ensure the area around the loose shingle is free of debris.
Reattaching the Shingle
- Apply Roofing Cement: Using a putty knife or trowel, apply a generous amount of roofing cement beneath the loose section of the shingle.
- Press Down Firmly: Make sure the shingle adheres well to the cement.
- Secure with Nails: For extra security, nail the shingle down, ensuring the nails are flush with the shingle’s surface.
Sealing the Edges
- Apply More Cement: Place a small amount of roofing cement under the shingle’s edges.
- Smooth Out: Use the putty knife to smooth out any excess cement for a clean finish.
How to Remove a Loose Roof Shingle
Are you dealing with a loose shingle? It’s essential to approach its removal with care. Here’s how to do it without causing further damage:
- Insert the pry bar beneath the shingle located directly above the compromised one. Gently elevate it to break free from the adhesive, revealing the first set of nails.
- Position the pry bar under the problematic shingle and lift. Any remaining nails should begin to protrude slightly.
- Remove the pry bar, then press down on the shingle. This allows you to extract the partially exposed nails fully.
- Apply the same method to the shingle overhead to remove the secondary nail set.
- Finally, extract the faulty shingle from its position.
Steps to Installing a New Shingle
Replacing a shingle can make all the difference when it comes to maintaining the integrity of your roof.
Here’s a concise guide to get you started:
- Carefully position the fresh shingle in the intended spot.
- Raise each tab on the new shingle, apply adhesive beneath them, and then smoothly press down for a snug fit.
- Using the original nailing pattern as a guide, securely fasten the shingle.
- To ensure a cohesive finish, apply sealant and add nails to the shingle directly on top of the newly placed one.
Preventing Future Loose Shingles
Proactive measures today prevent bigger problems tomorrow.
Ensuring your shingles are firmly anchored from the outset can sidestep complications down the road.
Regular Roof Checkups
Scheduling periodic roof checkups can help identify potential problems before they become severe.
Proper Installation
Ensuring shingles are installed correctly from the outset is crucial. This includes using the proper nails and adhesive.
Addressing Water Damage
Water is a shingle’s arch-nemesis. Regularly check for signs of water leaks and address them immediately.
When to Seek Professional Help
DIY roof repair can often be cost-effective, and there’s a sense of pride in handling home repairs yourself.
However, understanding when to call upon seasoned professionals is essential for the safety and longevity of your roof.
Here are scenarios where the expertise of roofing professionals becomes invaluable:
Multiple Loose Shingles
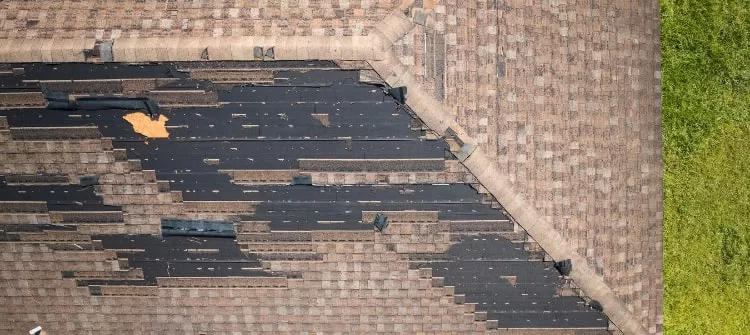
When you notice not just one but several loose or missing shingles, it might indicate an underlying issue with your roof’s structure or installation.
Addressing one shingle might be simple, but fixing multiple ones requires precision, ensuring the pattern and alignment remain consistent across the roof.

Signs of Extensive Water Damage
Water damage isn’t always a straightforward fix. Observing dark spots, mold, or any indication of prolonged water exposure on or beneath the shingles could suggest a more deep-rooted problem.
Professionals possess the expertise to trace the source of the leak, recommend the best course of action, and prevent potential future damage.
Uncertainty about the Repair Process
Roof repairs demand specific tools, materials, and techniques.
If you feel uncertain or overwhelmed at any point during the inspection or repair process, it’s a clear sign to bring in the experts.
A repair misstep could lead to further complications, potentially escalating repair costs.
Frequently Asked Questions
Here are a few common roofing questions referring to roofs and roof shingle repair:
What are the signs of a loose or damaged shingle?
Loose shingles often exhibit signs such as curling at the edges, buckling in the middle, or moving with little resistance when gently tugged.
How often should I inspect my roof for potential problems?
Regular checkups, preferably twice a year and after major storms, can help identify and address roofing issues before they escalate.
Can I fix a single loose shingle on my own, or should I always call a professional?
While minor issues like a single loose shingle can often be a DIY fix, you must be confident in your skills. If unsure, it’s always best to consult a roofing expert.
What materials and tools are essential for repairing loose shingles?
Essential items include roofing cement or adhesive, roofing nails, a putty knife or trowel, a hammer, replacement shingles, and necessary safety gear like gloves and non-slip shoes.
When is water damage on shingles a cause for concern?
Any signs of prolonged water exposure, dark spots, or mold on or beneath the shingles could suggest deeper issues that require professional intervention.
Conclusion: DIY Roof Shingle Fixes vs. Professional Help
In wrapping up, maintaining a sturdy and healthy roof is fundamental for home protection.
Whether addressing minor shingle repairs or confronting more intricate issues, understanding when and how to intervene is pivotal.
But remember, while DIY solutions offer quick fixes, there’s no substitute for the expertise and equipment that professional roofers bring. Prioritize your home’s safety and longevity—invest in quality roof repairs and maintenance.
After all, a well-maintained roof isn’t just a shelter; it’s a testament to a secure and sound home.

Lean on a Professional Roof Contractor for Help
Knowing when to call in expert hands is crucial whether you opt for DIY fixes or seek professional guidance. A licensed roofing specialist, especially from Oklahoma, can determine whether your roof requires minor tweaks or a complete overhaul.
For the best outcomes in roof shingle maintenance, consider partnering with experts known for their excellence in residential roofing. The advantage? Peace of mind, knowing you’ve entrusted your home to the best.
Belter Roofing has been a trusted name in Oklahoma’s roofing scene since 2015. With a rich portfolio spanning various roofing styles, they also maintain an exhaustive record of their quality work. If you need them, they’re just a call away.
So, whether you’re delving into DIY shingle repair or relying on professional expertise, rest assured that your Oklahoma home’s roof is built to endure with the proper assistance.
Let's Have a Conversation
Table of Contents
- Introduction
- Evaluate shingle damage
- Identifying loose shingles
- Essential tools and materials
- How to secure loose roof shingles
- How to remove a roof shingle
- How to install a roof shingle
- Preventing future loose shingles
- When to seek professional help
- Frequently asked questions
- Conclusion: DIY vs. professional help
- Rely on a professional roofer
Share this Article

